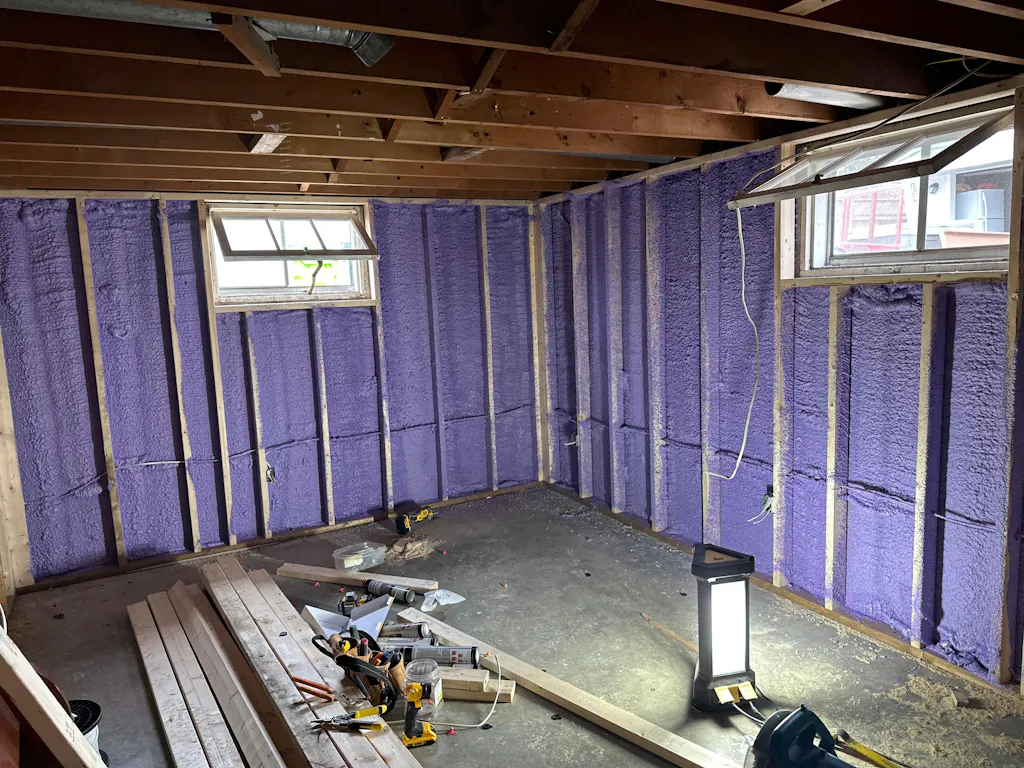
Basement insulation plays a major role in improving comfort, energy efficiency, and moisture control. Many homeowners are now turning to spray foam insulation as a reliable DIY solution. It seals air leaks, resists moisture, and delivers a higher R-value compared to traditional materials.
This guide explains how to apply spray foam insulation in your basement safely and effectively. It also covers tools, costs, mistakes to avoid, and climate considerations to help you make informed decisions.
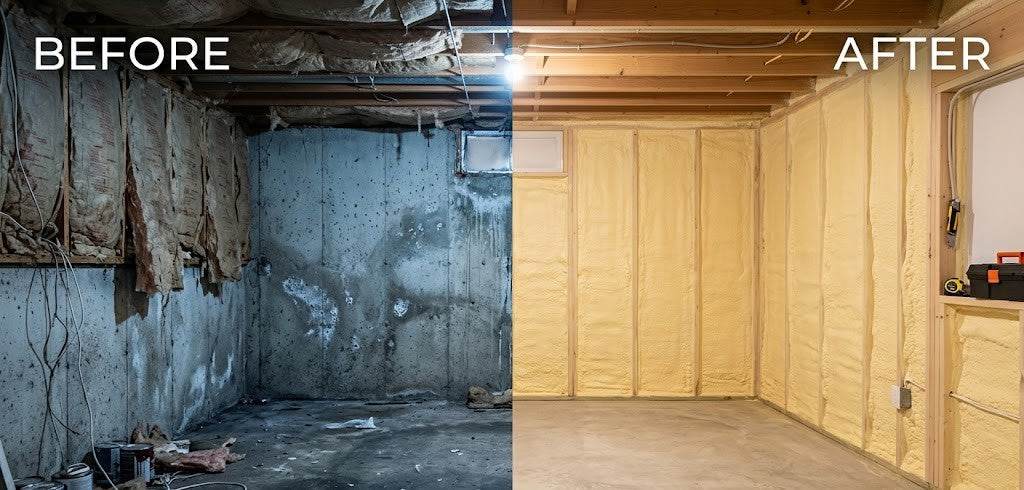
Why Spray Foam Insulation Is Ideal for Basements
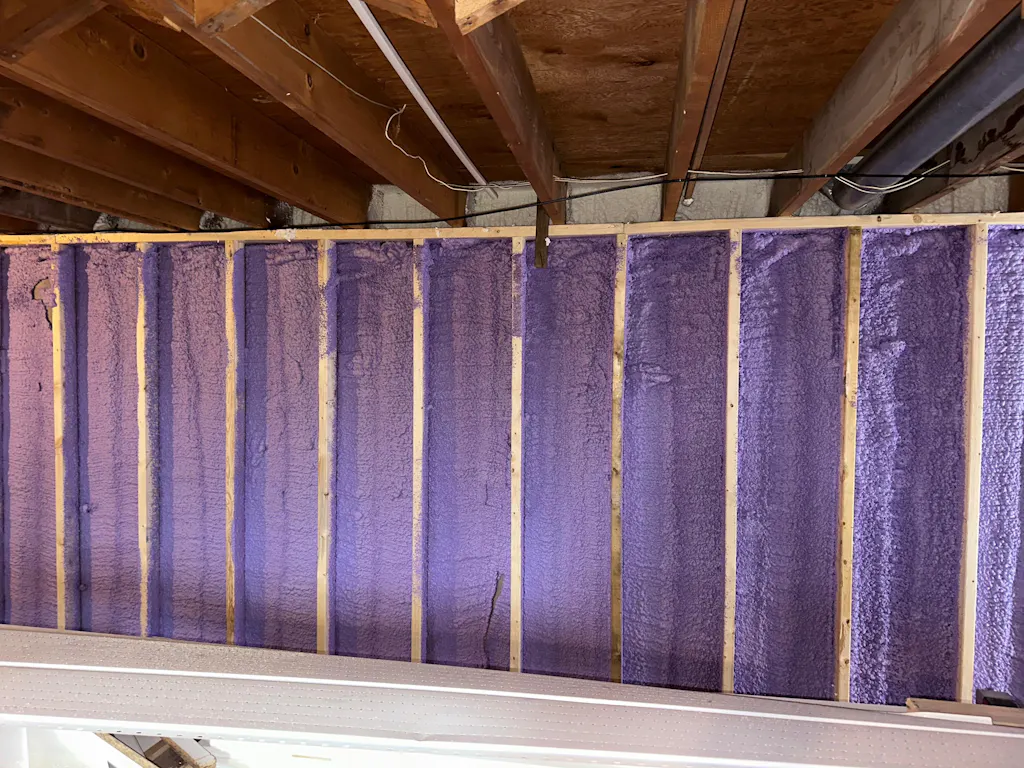
Spray foam insulation is one of the most effective materials for basement environments. It expands to fill gaps, creating an airtight seal that prevents heat loss and moisture intrusion. This makes it especially useful in damp or cold regions.
Unlike fiberglass or rigid boards, spray foam combines insulation and air sealing in one step. Many homeowners evaluating whether it fits their needs often consider factors outlined in this overview of basement foam benefits, including durability and mold resistance.
Key benefits include:
- High energy efficiency and lower utility bills
- Moisture resistance and mold prevention
- Long lifespan with minimal maintenance
- Strong adhesion to basement walls and rim joists
Types of Spray Foam Insulation Explained
Understanding the types of spray foam is essential before starting your DIY project. Each type has different performance levels, costs, and applications.
Open-Cell Spray Foam
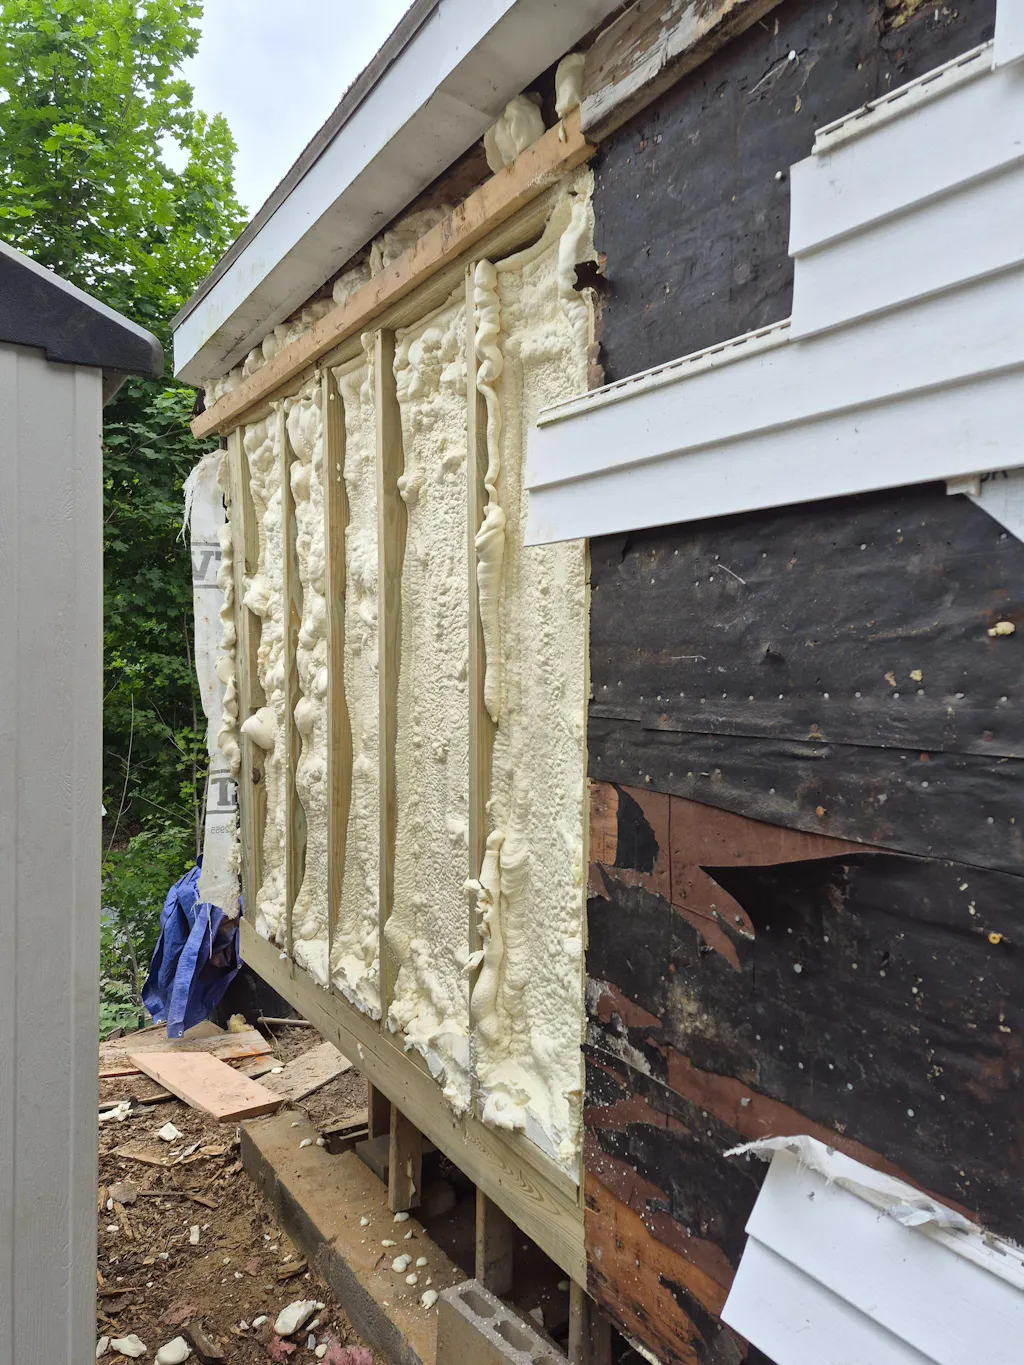
Open-cell foam is softer and expands more after application. It is generally more affordable and easier to work with for beginners. However, it has a lower R-value and does not provide strong moisture resistance.
Closed-Cell Spray Foam
Closed-cell foam is dense and offers a higher R-value per inch. It also acts as a vapor barrier, making it ideal for basements and humid environments. This type is preferred for long-term durability and moisture protection.
Open vs Closed Cell Foam
|
Feature |
Open-Cell Foam |
Closed-Cell Foam |
|
Cost |
Lower |
Higher |
|
R-Value |
Moderate |
High |
|
Moisture Resistance |
Low |
High |
|
Expansion |
High |
Moderate |
|
Best Use |
Interior walls |
Basements, exterior |
Tools and Materials You’ll Need

Before starting, gather all tools and materials to ensure a smooth workflow. Preparation reduces mistakes and improves application quality.
Essential tools and materials:
- Spray foam insulation kit
- Protective gloves, goggles, and respirator
- Utility knife for trimming
- Drop cloths and plastic sheets
- Painter’s tape
- Ladder or step stool
- Ventilation fan
Using a complete kit simplifies the process. Many beginners rely on guidance from detailed resources like this foam installation process to understand equipment setup and usage.
Safety Precautions Before You Begin
Safety is critical when working with spray foam insulation. The chemicals used can be harmful if proper precautions are not taken.
Ensure the workspace is well-ventilated before starting. Always wear protective gear to avoid skin and respiratory exposure. Keep the area free from open flames, as some foam materials can be flammable during application.
Important safety tips:
- Wear a respirator mask at all times
- Use gloves and full-body protection
- Keep windows open or use exhaust fans
- Follow manufacturer instructions carefully
- Check local building codes and regulations
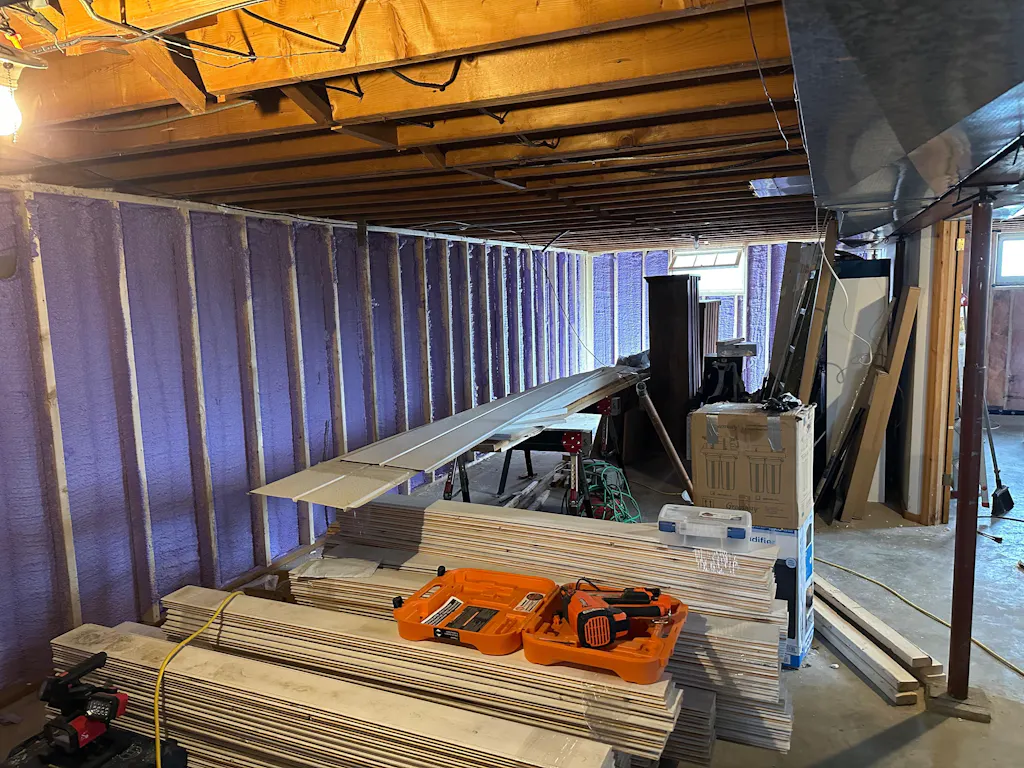
Preparing Your Basement for Spray Foam Insulation
Preparation is one of the most important steps in achieving a successful insulation job. A clean and dry surface ensures proper adhesion and performance.
Start by removing dust, debris, and old insulation from the walls. Inspect for cracks, leaks, or moisture issues and repair them before applying foam. Cover windows, electrical wiring, and fixtures with plastic sheeting to prevent accidental spraying.
Many homeowners follow structured methods similar to this basement insulation method to ensure no critical step is missed.
Preparation checklist:
- Clean all surfaces thoroughly
- Seal cracks and gaps
- Ensure walls are completely dry
- Mask off sensitive areas
- Arrange tools for easy access
Step-by-Step Guide to Applying Spray Foam Insulation

Applying spray foam requires patience and consistency. Following the correct steps will help you achieve even coverage and avoid costly mistakes.
Step 1: Set Up the Equipment
Prepare the spray foam kit by shaking the tanks and attaching the hose and nozzle. Ensure all connections are secure before starting.
Step 2: Test the Spray
Always test the foam on a scrap surface. This helps you understand expansion rate and spray pattern before applying it to basement walls.
Step 3: Apply Foam Evenly
Spray in thin, consistent layers. Hold the nozzle at a steady distance and move in smooth motions. Avoid applying too much foam at once.
Step 4: Allow Expansion and Curing
Spray foam expands quickly after application. Allow it to cure fully before touching or trimming. This process ensures maximum insulation performance.
Step 5: Trim Excess Foam
Once cured, use a utility knife to trim any excess foam. This creates a smooth surface for finishing or drywall installation.
If you are new to DIY insulation, step-by-step breakdowns like this DIY foam steps can help reinforce proper techniques.
Common Mistakes to Avoid

Mistakes during installation can reduce insulation effectiveness and lead to long-term issues. Being aware of common errors helps you avoid costly fixes.
Avoid these common mistakes:
- Applying foam too thick in one pass
- Ignoring ventilation requirements
- Skipping surface preparation
- Using the wrong foam type
- Not wearing protective equipment
Each mistake can impact insulation performance and safety. Taking time to plan reduces risks significantly.
Cost Breakdown of DIY Spray Foam Insulation
Understanding costs helps you budget effectively and compare DIY versus professional options. Spray foam insulation can vary depending on type, thickness, and coverage area.

| Home area | Average total cost |
|---|---|
| Attic | $3,000 – $8,000 |
| Basement | $2,500 – $9,000 |
| Crawl space | $2,000 – $4,000 |
| Garage | $2,000 – $7,500 |
| Rim joists | $2,000 – $2,500 |
| Around HVAC | $1,500 – $2,500 |
| All exterior walls | $4,000 – $10,000 |
| Whole house | $8,000 – $20,000 |
| Shed | $1,500 – $6,000 |
Cost Comparison Table
|
Option |
Cost per Sq Ft |
Total Cost (Average Basement) |
|
DIY Spray Foam |
$1.50 – $3.00 |
$1,500 – $3,500 |
|
Professional Installation |
$3.00 – $7.00 |
$3,000 – $8,000 |
DIY projects are generally more affordable, but they require time, effort, and attention to detail.
Spray foam insulation cost by type
The type of spray foam significantly impacts both the upfront cost and long-term performance of your insulation. Two main types are available open-cell foam and closed-cell foam each with distinct characteristics, price points, and benefits.
| Foam type | Average cost per square foot* | Best for |
|---|---|---|
| Open-cell spray foam | $1.50 – $3.50 |
|
| Closed-cell spray foam | $3.00 – $5.00 |
|
How Much Spray Foam Do You Need?
Estimating the right amount of spray foam is essential for efficiency. Spray foam is measured in board feet, which represents a 12” x 12” area at 1-inch thickness.
Coverage Calculation Table
|
Area (sq ft) |
Thickness (inches) |
Board Feet Needed |
|
500 |
2 |
1,000 |
|
800 |
3 |
2,400 |
|
1,000 |
2 |
2,000 |
To calculate:
- Multiply square footage by thickness
- Adjust based on foam expansion rate
Climate Considerations for Basement Insulation
Climate plays a significant role in choosing the right insulation type. Basements in colder climates require higher R-values, while humid areas need strong moisture resistance.
Key considerations:
- Cold climates: Use closed-cell foam for maximum insulation
- Humid regions: Focus on moisture control and vapor barriers
- Flood-prone areas: Ensure additional sealing and drainage
Choosing the right foam type improves long-term performance and prevents structural issues.
DIY vs Professional Installation: Which Is Better?

Both DIY and professional installation have advantages depending on your experience level and project size.
DIY Pros:
- Lower cost
- Flexible schedule
- Hands-on control
DIY Cons:
- Learning curve
- Safety risks
- Potential for mistakes
Professional Pros:
- Expert application
- Faster results
- Guaranteed performance
Maintenance and Long-Term Performance
Spray foam insulation requires minimal maintenance, but regular inspections are still important. Over time, small gaps or cracks may appear due to structural shifts.
Inspect your basement annually for signs of moisture or damage. Address issues early to maintain insulation efficiency and indoor comfort.
FAQs About DIY Spray Foam Insulation
Is spray foam insulation safe for basements?
Yes, spray foam insulation is safe when applied correctly with proper ventilation and protective gear. Always follow manufacturer guidelines to minimize exposure risks.
Safety tips:
- Use respirators and gloves
- Ensure airflow during application
- Avoid direct skin contact
How long does spray foam insulation last?
Spray foam insulation can last over 20–30 years with proper installation. Its durability makes it a long-term solution for energy efficiency.
Can I apply spray foam over existing insulation?
Yes, but only if the existing insulation is dry and in good condition. Remove damaged or moldy materials before applying foam.
Do I need a vapor barrier with spray foam?
Closed-cell spray foam acts as a vapor barrier in most cases. Open-cell foam may require an additional barrier depending on climate.
How difficult is DIY spray foam insulation?
DIY spray foam insulation is manageable with proper preparation and tools. Beginners can succeed by following step-by-step instructions and safety guidelines.