Spray-On Roofing: Do-It-Yourself Guide for Affordable Roof Protection
Spray-on roofing is a practical way to upgrade your roof without spending a lot. It is also called liquid roofing, spray foam roofing, or roof coating. Many homeowners use it to protect, restore, and improve an existing roof.
This DIY-friendly roofing method creates a seamless protective layer over the roof surface. It can help stop water infiltration, improve energy efficiency, and extend the life of your current roof. For homeowners watching their budget, it can be a smart alternative to a full roof replacement.
Spray-on roofing is popular because it is easier to apply and maintain than many traditional roofing systems. It can work on different roof types when the surface is prepared correctly. This guide explains what spray-on roofing is, how it works, what tools you need, and how to apply it safely.
Key Takeaways
-
Spray-on roofing is a DIY-friendly roof coating solution.
-
It creates a seamless, waterproof layer over the roof.
-
It can cost less than traditional roof replacement.
-
Liquid roofing can extend the life of an existing roof.
-
Proper application may improve energy efficiency.
-
Roof preparation is essential for good adhesion.
-
Safety gear is important when using spray foam or roof sealant.
-
Professional help may be better for large, steep, or damaged roofs.
What Is Spray-On Roofing?
Spray-on roofing is a liquid-applied roofing system. The material is sprayed directly onto an existing roof surface. Once it cures, it forms a seamless and protective roof membrane.
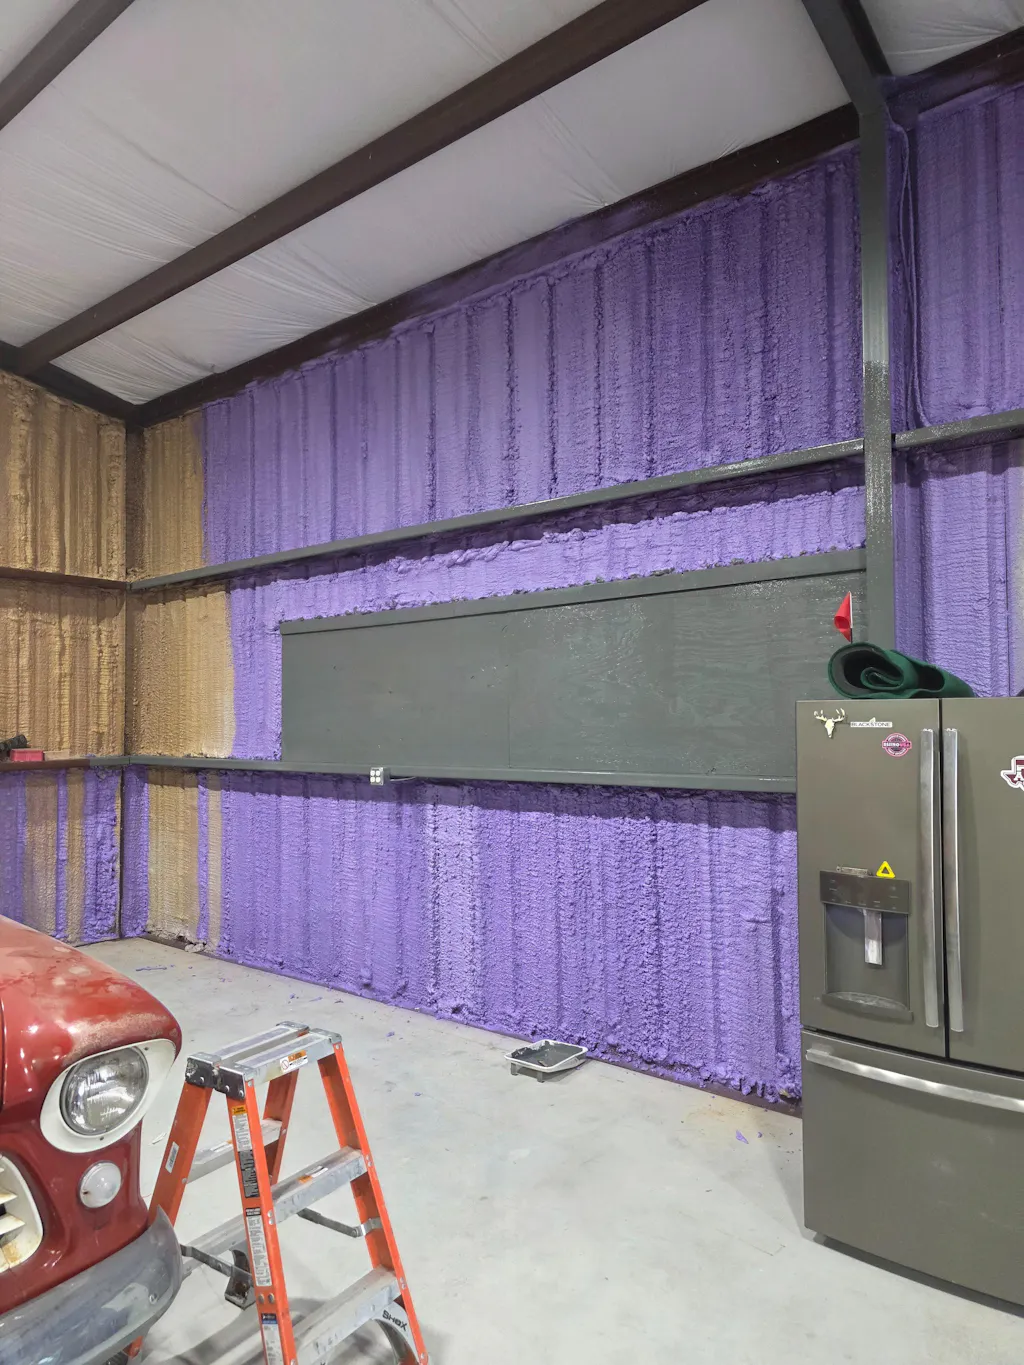
This system often uses polyurethane spray foam, silicone coating, acrylic coating, rubber coating, or other liquid roof sealants. Homeowners comparing product types can also review VB insulation options when choosing foam materials for insulation-focused projects. These materials are designed to bond tightly to the roof surface.
Spray-on roofing is also known as spray foam roofing, liquid roofing, spray roof coating, or spray-on roof sealant. It is used for roof restoration, leak protection, insulation, and energy savings. When applied correctly, it can be useful for both residential and commercial roofing projects.
Benefits of Spray-On Roofing
Spray-on roofing helps restore an aging roof without removing the existing system. It creates a continuous layer over seams, cracks, and weak spots. This reduces the chance of water infiltration.
It can also improve energy efficiency. Reflective coatings reduce heat absorption and may lower cooling costs. Because the system is lightweight, it usually does not add major structural stress.
|
Benefit |
Why It Matters |
Best Use |
|
Waterproofing |
Helps reduce leaks |
Roofs with seams or small cracks |
|
Energy efficiency |
Reflects heat |
Hot or sunny climates |
|
Roof life extension |
Adds protection |
Aging but stable roofs |
|
Lightweight layer |
Reduces structural load |
Existing roof restoration |
|
Less waste |
Avoids full tear-off |
Eco-conscious projects |
Types of Spray-On Roofing Materials
Different spray roof coatings have different strengths. Acrylic coatings are affordable and easy to apply. Silicone coatings offer strong UV resistance and weather protection.
Polyurethane coatings are durable and impact-resistant. Rubber coatings are flexible and useful in areas with temperature changes. Homeowners concerned about moisture protection should understand whether spray foam resists water before choosing a roof coating system.
|
Material |
Main Advantage |
Common Use |
|
Acrylic |
Affordable and easy to apply |
Budget roof coating |
|
Silicone |
UV and weather resistance |
Sun-exposed roofs |
|
Polyurethane |
Durable and impact-resistant |
Stronger protection |
|
Rubber |
Flexible |
Temperature changes |

How to Prepare Your Roof for Spray-On Roofing
Roof preparation is one of the most important steps in a spray-on roofing project. A dirty or damaged surface can stop the coating from bonding correctly. Poor preparation can also lead to peeling, cracking, or early failure.
Start by inspecting the roof for damage. Look for cracked shingles, open seams, rust, gaps, holes, or soft areas. These problems should be repaired before applying spray foam or roof coating.
Next, clean the roof thoroughly. Remove moss, dirt, leaves, loose material, and debris. A clean surface helps the spray roof coating form a strong bond.
Roof Preparation Checklist
-
Inspect the roof for cracks, leaks, or damaged shingles.
-
Repair or replace damaged shingles before coating.
-
Seal cracks, gaps, and small holes.
-
Remove moss, dirt, and roof debris.
-
Clean the roof surface with proper tools.
-
Check and clean gutters.
-
Make sure the roof has proper ventilation.
-
Trim overhanging tree branches.
-
Allow the surface to dry before application.
Roof Preparation Tools
|
Preparation Step |
Importance |
Tools Needed |
|
Roof inspection |
Identifies underlying issues |
Ladder, binoculars |
|
Surface cleaning |
Ensures proper adhesion |
Pressure washer, broom |
|
Repairs |
Prevents future damage |
Roofing nails, sealant |
|
Ventilation check |
Promotes roof longevity |
Ventilation calculator |
Safety Gear and Tools Needed for DIY Spray-On Roofing
Safety is important when using spray foam or liquid roof coating. These products may create fumes, mist, and overspray. Wear protective gear and work only in dry, calm weather.
You also need the right application tools. A sprayer, roller, ladder, and cleaning supplies help create a smooth finish. Homeowners using a spray foam kit should follow the manufacturer’s instructions for mixing, coverage, safety, and application.
Safety Gear
-
Respirator mask
-
Safety goggles
-
Chemical-resistant gloves
-
Protective coveralls
-
Non-slip footwear
Tools and Materials
-
Spray foam kit or roof coating
-
Primer
-
Spray gun or airless sprayer
-
Paint roller and extension pole
-
Pressure washer
-
Utility knife
-
Tarp, masking paper, and painter’s tape
-
Solvent, rags, trash bags, and mild detergent

Step-by-Step Spray-On Roofing Application
Start with a clean, repaired, and dry roof. Mix the roof coating according to the product directions. Pour it into the sprayer only when the mixture is ready.
Begin spraying from one corner of the roof. Move in a steady, overlapping pattern and keep the nozzle about 12 inches from the surface. Applying two thin coats often works better than one thick coat.
Allow each coat to dry before applying the next one. Drying time depends on the product, weather, and roof conditions, so it helps to know how spray foam dries before planning the full project timeline.
Application Steps
-
Clean and repair the roof.
-
Let the surface dry completely.
-
Mix the coating as directed.
-
Load the sprayer.
-
Spray in overlapping passes.
-
Apply two thin coats.
-
Let each coat dry fully.
-
Allow at least 24 hours for curing.
-
Inspect and touch up missed areas.
Common DIY Spray-On Roofing Mistakes to Avoid
Many spray roof sealant problems come from poor preparation or bad weather. Rain, wind, and extreme heat can affect the final result. Uneven surfaces can also cause pooling or thin coating areas.
Applying the coating too thin may reduce protection. Applying it too thick may cause cracking or uneven curing. Thin, even layers usually work best.
Mistakes to Avoid
-
Spraying on a dirty or wet roof
-
Skipping repairs before coating
-
Applying during rain or high wind
-
Using the wrong coating type
-
Applying one thick coat
-
Walking on the roof before curing
-
Ignoring safety equipment
Energy Efficiency Benefits of Spray-On Roofing
Spray-on roofing can help reduce heat absorption. Reflective coatings bounce sunlight away from the roof surface. This may keep the home cooler during warm weather.
Spray foam roofing may also add insulation. Better insulation can reduce heat transfer through the roof. These benefits may lower HVAC strain and reduce utility bills.
VB Insulation’s Energy-Efficient Spray-On Roofing Solutions
VB Insulation provides spray-on roofing that meets Energy Star standards. Their products offer strong insulation, helping you save energy at home. The table below compares VB Insulation spray-on roofing with traditional roofing.
|
Feature |
VB Insulation Spray-On Roofing |
Traditional Roofing |
|
Reflectivity |
High |
Low to moderate |
|
Insulation value |
Excellent |
Varies |
|
Energy savings |
Up to 30% |
Minimal |
|
Lifespan |
20–30 years |
15–20 years |
Choosing spray-on roofing means investing in a lasting, energy-saving option. It can help protect your home while supporting lower energy use. It is also a practical choice for homeowners who want both roof protection and better efficiency.